
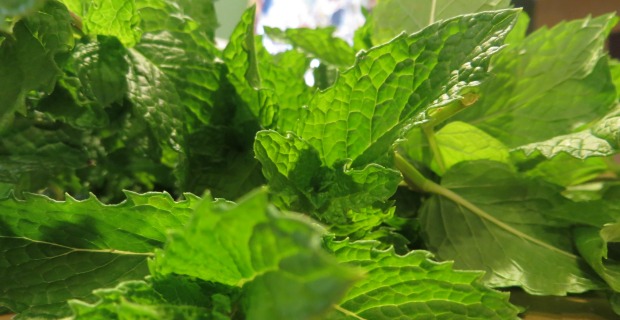
Got mint?
Yeah…mint sure is prolific, isn’t it?!
So, when thinking about DIY gifts for this year’s gift series and my first intention to pull as many ingredients as possible from our garden before going elsewhere to source items, of course mint came to mind!
Now, I’ve dried mint in the past and kept it for tea during the cold months, but before now I’ve not done much else with it. Imagine my excitement when I started Googling and found no less than a million ideas for the mountains of mint others seem to have coming out of their gardens as well! So, I settled on mint sugar and mint extract to start and am vetting a few other ideas to play with later as well.
Both of these DIYs are very simple (each requiring only two ingredients), can be done at the same time, don’t require specific measurements, and will only take a few minutes!

Mint Sugar
Ingredients – Sugar, Fresh Mint
Supplies – Mortar & Pestle, Quart Mason Jar
Process:
- Harvest, wash and dry a few sprigs of mint
- Pull leaves from the stem and, a little at a time, bruise the leaves using your mortar & pestle to help release the oils
- In your mason jar, layer sugar and bruised leaves until about 3/4 full
- Place a lid on your jar and shake to mix
- Label your Mint Sugar with the contents and date
- Put your jar in your pantry or in your pantry for ~2 weeks
- Shake every couple of days to mix (you might have to get in there and stir with a spoon so your sugar doesn’t clump)
- At the end of the 2 weeks, you can remove the leaves if you like. Otherwise, they won’t do any damage by being left in there
Note – If using as a gift, you’ll want to either make several batches or a much larger batch. Once ready, carefully pour your Mint Sugar into pretty jars and label for your recipient.
Uses – You can use your Mint Sugar to sweeten any of your normal baking projects (brownies, fudge, sweet bread), to sprinkle on top of sugar cookies or to rim a glass of mojitos!

Mint Extract
Ingredients – Vodka, Fresh Mint
Supplies – Mortar & Pestle, Two Quart Jars, Cheesecloth
Process:
- Harvest, wash, and dry a few sprigs of mint
- Leaving the leaves on the stem, carefully fold a sprig or two of mint into your mortar and carefully bruise with your pestle
- Add your bruised mint sprig to one of your quart jars
- Repeat this process until both quart jars are lightly packed with mint sprigs
- Pour the vodka over the mint in each jar
- Place a lid on your jar and shake to mix
- Label your Mint Extract with the contents and date
- Put your jar in your pantry or in your pantry for ~2 months
- Shake every couple of days to mix
- At the end of the 2 months, strain your extract using cheesecloth
Note – If using as a gift, carefully pour your Mint Extract into pretty jars and label.
Uses – You can use your Mint Extract just as you would the stuff you purchase form the store. Make some cookies, peppermint patties or chocolate chip, mint ice cream!
***
Alright, there you have it! Two super simple ways to use up some of your copious amounts of mint!
Now, do tell, what’s your favorite way to use mint?
xoxo,
M
Linking up to the Homestead Barn Hop #174, Homemade Mondays #96
Love these ideas. Not only will I make these 2 recipes for the abundance of mint in my garden but also for the lemon balm growing in my garden as well.
Oh yes, Lemon Balm will be excellent!
Pingback: Preserving Herbs for Baking Needs | Homespun Seasonal Living
Wow!! Thanks for the gift idea. Harvested my own mint and just made my first batch of mint extract. I am using Infinity Jars as they keep the extract fresh for longer and are super pretty.
Pingback: Preserving Mint for Food & Medicine - Homespun Seasonal Living
What a great thing to do with all my extra mint…it went crazy in my garden this year!
Tracy @ OurSimpleLifeSC recently posted…Cooking Safe Tips for Homemakers
Ooooooo! I’ve been thinking about ways to use up my mint – especially the pineapple & chocolate mints. These are THE ideas of the day.
Christmas presents are going to get done early this year…
Thanks so much for sharing!
You’re welcome, Terri! Enjoy! 🙂